Showing posts with label chocolate. Show all posts

20 February, 2011

Guinness Cupcakes with Bailey's Irish (Whipped) Cream Frosting


 Okay, enough healthy stuff! With this recipe, I have reached cupcake utopia! These were amazing. The cupcake itself has Guinness in the batter and though it doesn't taste alcoholic-y, it does taste deliciously different. The cake itself is also extremely moist. The addition of whipped cream frosting with bailey's in it just takes the whole thing to another dimension. This recipe would probably make a great cake too but we are partial to cupcakes at this house, as you all know. I hope that if you make them, you find them as delicious as we did.

Guinness Cupcakes

1 1/2 cups Guinness stout
1/2 cup olive oil
1/2 cup whole milk
1 tbsp vanilla extract
3 eggs
3/4 cup sour cream
2 1/2 cups all-purpose flour
3/4 cup Hershey's Special Dark Cocoa
2 cups sugar
1 1/2 tsp baking soda

Preheat oven to 350 degrees.  In the mixing bowl of your stand mixer (or a bowl with a hand mixer), combine the Guinness, olive oil, milk and vanilla. Beat in each egg, one at a time and then mix in the sour cream.
In another bowl, combine the flour, cocoa, sugar and baking soda, mixing well.  With the stand mixer on, slowly add the dry ingredients to the wet ingredients, being sure that everything is well mixed.

Line your cupcake pan with cupcake liners of your choice. Carefully add batter to a large ziploc bag or pastry bag. Snip end of ziploc bag. Squeeze enough batter into each cupcake liner so its 3/4 full.

Bake at 350 for 20-25 minutes or until a toothpick inserted into the center of a cupcake comes out mostly clean. Cool completely before frosting. And when I say completely, I mean COMPLETELY unless you'd like to be cleaning up melted whipped cream frosting from off every surface in your kitchen. It will happen, I've been there.

Bailey's Irish (Whipped) Cream Frosting

2 cups heavy whipping cream
2/3 cup granulated sugar
3 tbsp Bailey's Irish Cream

In the bowl of your stand mixer, add the whipping cream and sugar. Beat into oblivion, until soft peaks form when you pull the beater out of the cream. Add bailey's and beat until thoroughly distributed. Store, covered, in refrigerator until ready to use.

When cupcakes are cool, put frosting into a pastry bag with a large star tip and pipe onto each cupcake. Or you could just dollop it onto each cupcake for a more homemade rustic look.  Enjoy.


19 December, 2010

Peanut Butter Pie


I have a peanut butter obsession. I blame it on my mother who has an equal obsession for peanut butter. Peanut butter on toast, on pancakes (which is the only way to eat pancakes), on a bagel with honey, on a spoon right from the jar, on Oreos. But the best way to eat peanut butter is covered in chocolate.

So with that in mind, I give you my mother's peanut butter pie recipe. I have her permission, promise.

Peanut Butter Pie

1 ready-made pie crust (I like Sara Lee)

For the Bottom Layer:

3/4 cup semi sweet chocolate chips
1 tbsp butter
3 tbsp water
1/4 cup powdered sugar

For the Peanut Butter Filling:

1 cup butter
1 cup brown sugar
1 cup all natural peanut butter
2 cups heavy whipping cream
2 tbsp powdered sugar

For the Top Layer:

1 cup semi sweet chocolate chips
2 tbsp butter
4 tbsp milk
2 tsp corn syrup

Bake empty pie crust according to the package directions, remembering to prick the pie on bottom and sides. Allow to cool.

Meanwhile, melt 1 tbsp butter with 3 tsp water in a small saucepan over medium heat. Add the 1/4 cup powdered sugar and mix well. Add 3/4 cup chocolate chips and mix until completely melted and smooth. Add more water if needed for spreading consistency. When crust is cooled, spread chocolate mixture evenly along bottom and sides of pie crust. Refrigerate until firm.

 I made two pies. Half the time, double the calories.


In a larger saucepan, combine 1 cup butter with 1 cup brown sugar. Cook on medium heat, stirring often, until mixture is melted and smooth. Refrigerate to cool.

In a stand mixer, (or a bowl with a hand mixer), combine 2 cups heavy whipping cream with 2 tbsp powdered sugar. Mix into oblivion until stiff peaks form. Remove whipped cream from mixer bowl into another bowl, cover and refrigerate. In the same stand mixer bowl, combine 1 cup peanut butter and cooled brown sugar mixture. Beat until fully incorporated. Add 1 1/2 cups of whipped cream to peanut butter mixture. Beat until mixture is smooth and creamy. (reserve the rest of the whipped cream for future use or just eat it right out of the bowl). Pour peanut butter mixture into the chocolate covered pie crust. Refrigerate until firm.


Meanwhile, in a small saucepan, melt 1 cup semi-sweet chocolate chips, 2 tbsp butter, 4 tbsp milk and 2 tsp corn syrup over medium heat. Stir constantly to avoid burnage. When chocolate is fully melted and of a spreading consistency (add more milk if necessary), carefully pour melted chocolate over the peanut butter layer of the pie. Spread with a spatula to evenly coat, being careful not to over flow the crust rim. Refrigerate until firm.


Serve with vanilla ice cream if desired. (I never said it was healthy)


28 September, 2010

Cupcakes and misadventures


This weekend was truly a weekend of misadventures! We had a going away party for very very dear friends and I decided to be quite ambitious and make 2 dozen cupcakes and the 6 inch cake that I saw on the Not So Humble Pie blog (because I aspire to be at her caliber of cooking one day).  I planned ahead the recipes: the usual Chocolate Cupcakes (recipe here) and for the 6 inch layer cake, red velvet with cream cheese frosting and of course the fondant.

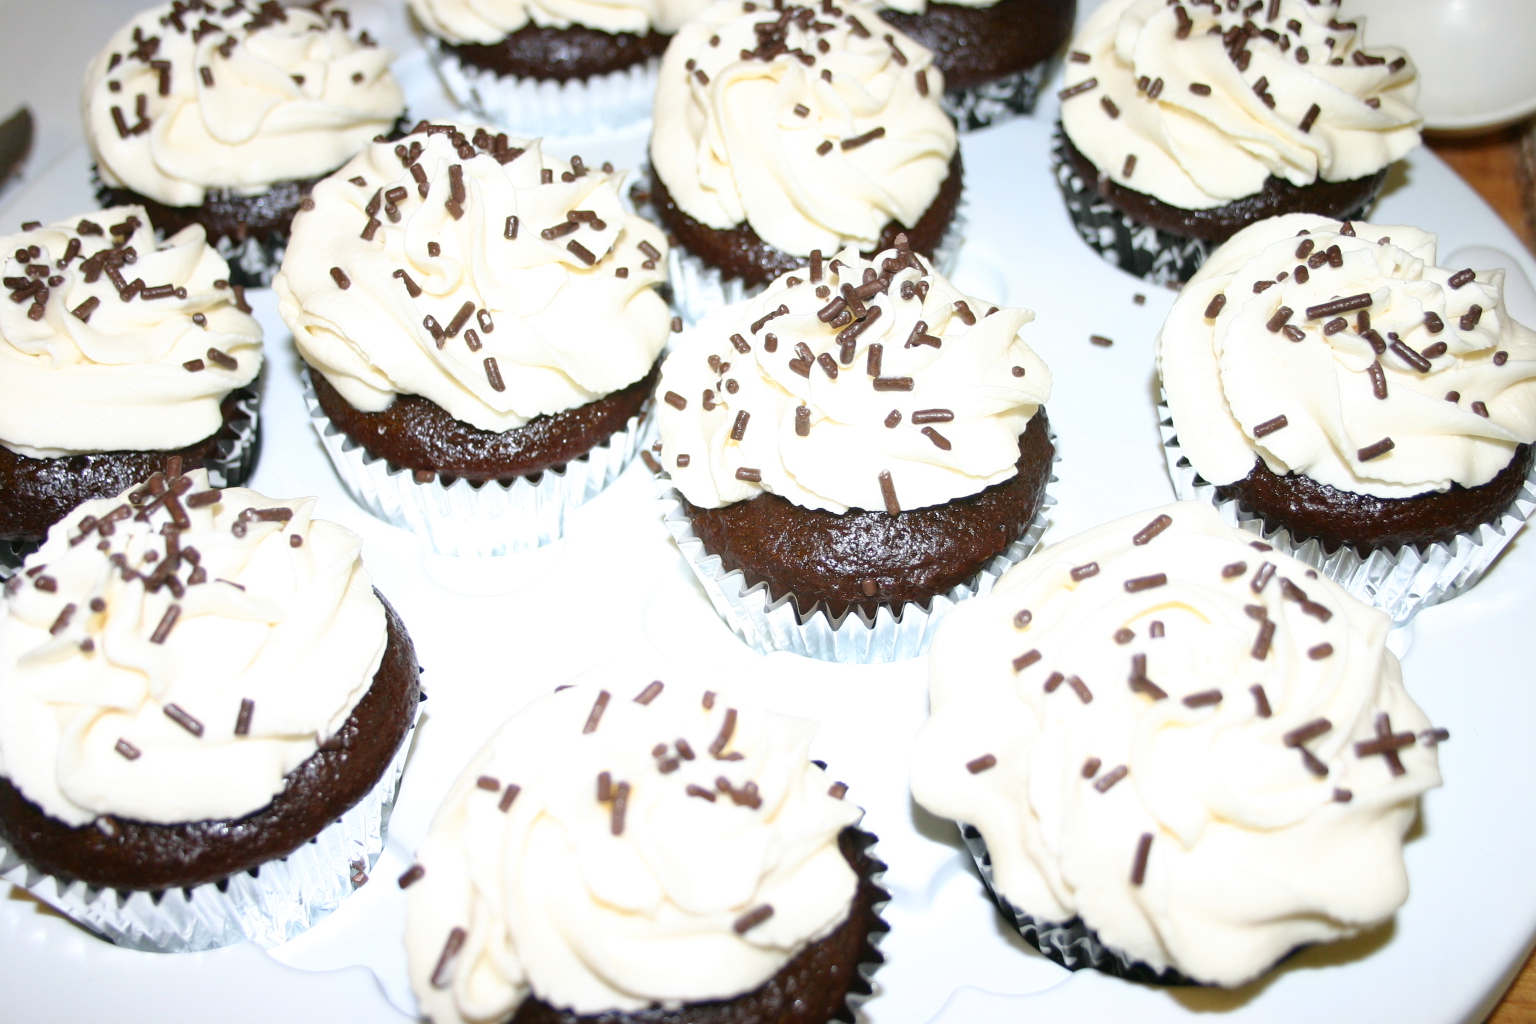
The chocolate cupcakes came out perfect as usual. I needed a new frosting since my buttercream tends to melt at the slightest temperature above 60 degrees. So I made this new recipe I got from a friend that includes shortening to prevent the 'Wicked Witch of the West in Water' syndrome that my recipe has. After making it, well, it tasted good but I really felt like it needed something.


Buttercream Icing (that doesn't melt into oblivion)

1 cup shortening
1 cup butter, softened
7 cups powdered sugar
2 tsp vanilla
4 oz raspberry jam (optional)

Combine all ingredients and mix well with an electric mixer. Tint to desired colour.
I tinted the icing a really pretty shade of raspberry pink and it just looked like it should taste raspberry pink too. So I dumped half a jar of raspberry jam into the frosting and voila! just enough raspberry-ness. I love when stuff like that happens.


 When the chocolate cupcakes were frosted and looked lovely, I moved onto the cake.
Again, the cake batter was remarkably easy to make. I used a recipe from an old issue of Cook's Illustrated magazine for both the cake batter and the frosting.

Red Velvet Cake
(adapted from Cook's Illustrated)

2 1/4 cups flour
1 1/2 tsp baking soda
1/8 tsp salt
1 cup buttermilk
1 tbsp white vinegar
1 tsp vanilla extract
2 large eggs
2 tbsp cocoa powder
2 tbsp red food colouring
1 1/2 sticks unsalted butter, room temperature
1 1/2 cups sugar

Preheat oven to 350 degrees. Grease and flour desired cake pans.

 
Whisk flour, baking soda and salt in  a bowl. In another bowl, whisk together buttermilk, vinegar, vanilla and eggs. In a small bowl, whisk together cocoa powder and food colouring.

With an electric mixer, beat butter and sugar until fluffy. Add a third of the flour mixture. Beat until incorporated. Add half of buttermilk mixture and beat until combined. Repeat with half of flour mixture and buttermilk mixture and then the rest of the flour mixture, beating well after each addition. Add cocoa mixture and beat until everything is well combined. Scrape into prepared pans and bake for 25 minutes or until a toothpick inserted into center comes out clean.


Cool the cakes in pans for 10 minutes then carefully turn onto a rack to cool completely.

Beautiful, rich colour!


While my little cakes were baking, I made the frosting.

Cream Cheese Frosting
(adapted from Cook's Illustrated)

2 sticks unsalted butter, softened
4 cups confectioner's sugar
16 oz cream cheese, softened and cut into 8 pieces
1 1/2 tsp vanilla
1/8 tsp salt

In an electric mixer, combine butter and sugar and beat until fluffy. Add cream cheese and beat until well combined. Beat in vanilla and salt. 

I ended up with WAY too much! Even after I frosted the whole cake, layers and all, I still had a ton leftover. So.... I made more cupcakes. Before I get to that though, I'll keep going with the adorable little cake. It is so cute.

I split each cake in half with a knife, spread each half with cream cheese frosting and started layering. I applied a crumb coat of frosting to the entire cake, which turned out to be way to thick, but whatever, and then moved onto the fondant. A friend recommended that instead of making the fondant myself (an easy but time-consuming process),  I should buy the 'Duff's' fondant sold at Michael's Crafts Store. It's actually very tasty as opposed to the usual revolting tasting stuff that you can buy; I'd recommend it.

I was too busy assembling the cake to remember to take photos of assembling the cake, sorry.
Here, I hit my first snag. Due to the tiny-ness of my kitchen, I don't have ample counter space to roll out enough fondant to cover the cake. Due to the fact that I had been cooking all afternoon and my kitchen does not contain a window, it was very hot which makes fondant a bit sticky and overly soft. After much trial and error, I finally ended up rolling out the fondant on an unrimmed cookie sheet sprayed with oil and, holding my breath, lifted it off the cookie sheet and draped on the cake.


Oh they make it look so easy on TV. It's not, they lie. First, the fondant ripped in a number of places. Second, I used too much frosting for my crumb coat, which I said before, so the frosting was oozing a bit out the sides. Third and possibly because of second, the cake was not the smooth perfection it should have been. It was too late though. So I covered all the ripped sections with cute little flowers made of different coloured fondant and called it a day. Well, not exactly. I still made vanilla cupcakes that night.


I love the colour of this batter! It's so gorgeous.


I've been meaning to try out a few vanilla recipes and what a better time than 9 pm with the kitchen a sheer disaster. Yeah, why not. So here is where my second misadventure started. First, let me say the one should never, ever put two types of flour right next to each other unless they are easily distinguishable. Bread flour is not the same as all purpose flour despite looking EXACTLY the same. I ended up using two cups of bread flour and one cup of all-purpose flour in a recipe that actually calls for 3 cups of cake flour!

 
By the time, I realized my mistake it was too late so I baked them anyway. It turned out okay though. Mike said that they tasted like sugar cookies instead of cupcake but that's not bad, right? To lighten the density of the cupcakes, I used my filler tip to fill each cupcake with a dollop of strawberry jam.


Then I tinted the frosting a pretty purple and piped it onto each cupcake to cover the hole. With some sprinkles and a fondant heart, cute and perfect looking. I did whip the frosting into oblivion while trying to tint it the correct shade of purple so it was very light and fluffy, not a bad thing at all. Between the jam and the light frosting, they managed to balance the density of the cupcake, so that oops did manage to work itself out.


Vanilla Cupcakes

3 cups flour, all-purpose (or 2 of bread flour and 1 of all-purpose if you want the sugar cookie taste)
2 cups sugar
1 cup butter, room temperature
3 eggs
1 1/2 tsp vanilla
1 1/2 tsp baking powder
1/4 tsp salt
1 cup buttermilk

Preheat oven to 350.

In a bowl, combine flour, sugar, baking powder and salt.

Beat sugar and butter in a mixer until fluffy. Add eggs one at a time, beating well after each addition. Add vanilla. Alternate adding flour mixture and buttermilk to sugar mixture, beating well after each addition.

Bake for 20 minutes or until a toothpick inserted into the center of a cupcake comes out clean.

And then comes the party, the third and final catastrophic misadventure...the chocolate cupcakes tipped in their carrier and the frosting fell off.


I ended up having to re-frost them with just a butter knife and cover them in sprinkles because there wasn't time to worry about re-piping the frosting into pretty shapes. I almost cried; it was terrible. Everybody thought they tasted good which is the point I suppose, but still...

28 August, 2010

Chocolate Cupcakes


I can't believe it's taken me this long to post about cupcakes. Cupcakes are a passion with me. I love making them and I LOVE eating them but I really enjoy making cool, different kinds of cupcakes. This probably began as a small child when my mama threw me an animal themed party just because. She painstakingly made cupcakes look like bears, pigs, elephants, porcupines, tigers, lions, etc.


These animal cupcakes became something of big deal in our house as we continued to make them for my baby brother's kindergarten class, a friend's graduation and other parties. And then I stumbled upon the book 'Hello, Cupcake' which instaneously restarted a need to make outrageous cupcakes.

I started with some the cupcakes in the book:

Spagetti Cupcakes (which tasted awesome!)


and Corn on the Cob Cupcakes (which tasted good when you scraped off the jellybeans)
 

For my parents 35th Anniversary, I made 24 different blue and white cupcakes.


Following that, I made cupcakes for a close friend's engagement party...


and her bridal shower.


And then some random cupcakes for a BBQ...

and for superbowl...


and my last endeavor, a surfboard/beach themed cupcake-scape with surfboards that were 'painted' to look like the surfboards owned by my husband and his friends.


This one was my favorite so far to make. And it was my first adventure into decorating sugar cookies with royal icing. I loved it.


I don't knwo why it's taken me this long to try royal icing but I am hooked. I freely admit that I did cheat and buy a royal icing mix instead of making my own but I do promise to try making my own soon. I did make the sugar cookies from scratch though. Will post that next.

All of these cupcakes were chocolate. I have yet to come up with a vanilla cake that I really like. This is a recipe of my mother's for DARK chocolate cake that mama and I adapted for cupcakes. Warning however, the batter is extremely thin and the cupcakes come out so moist that they are a bit difficult to frost. But they taste amazing so I deal with the frosting issue.

Dark Chocolate Cupcakes

 2 cups flour

2 cups sugar

1 cup cocoa

2 tsp baking soda

2 tsp baking powder

1/2 cup olive oil

2 eggs

2 cups water

Preheat oven to 350 degrees.  In the bowl of your electric mixer (or a bowl if you are using a hand mixer), combine flour, sugar, baking soda and baking powder. Add oil, eggs and water. Mix very, very throughly.

Line cupcake pan with choice of paper liners. Carefully add batter to a large ziploc bag or pastry bag. Snip end of ziploc bag. Squeeze enough batter into each cupcake liner 3/4 full.

Bake for 15-20 minutes or until a toothpick inserted into the middle of the cupcake comes out mostly clean.

When cupcakes are completely cooled, frost and decorate.

24 August, 2010

Chocolate Chip Pancakes


Pancakes, the iconic breakfast food that has an entire restaurant devoted to it. Pancakes are a big deal in my house. They are the breakfast tradition when my niece visits and every snow day that we get to sleep in and take the day off.

Now it must be understood that I was raised to NEVER bake anything from a box. Everything must be made from scratch. I do break that rule occasionally, for example, I still cannot make instant sugar-free pudding so I resort to Jell-o for that. And I also think that my brownies from scratch and Ghiradelli boxed brownie mix taste almost identical. But I digress.

Getting back to the making everything from scratch, naturally that would include pancakes. Mom's pancake recipe is almost as easy as the stuff you buy at the store and it tastes much, much better.

Pancakes

2 cups flour

2 tbsp sugar

4 tsp baking powder

1/2 tsp salt

2 eggs, lightly beaten

2 cups milk

4 tbsp olive oil

1/2 tsp nutmeg

1/4 tsp cinnamon

In a large bowl, combine flour, sugar, baking powder and salt. In another bowl, combine eggs, milk and olive oil. Add wet ingredients to dry ingredients. Whisk JUST until combined. Mixture will be lumpy.

Now, I did name this Chocolate Chip Pancakes so here is the chocolate part. At this point, add as many chocolate chips as is desired. Other add-ins include blueberries, bananas or strawberries.


Heat a griddle pan on medium high heat and spray with olive oil.  With a ladle, pour about a 1/4 of a cup of batter onto the griddle. (My griddle fits four pancakes at once, but that will depend on the size of the pan) When bubbles start to form and pop on the top of the pancake, gently flip pancakes. Check for golden brown colour by lightly lifting one side of the pancake. When both sides are golden brown, remove pancakes to a plate and place in a warm oven until everything is ready.


Since this is another food tradition is my house, there is of course a specific way to observe this tradition. In my house and in my mother's, pancakes are spread with a little bit of butter and a liberal amount of peanut butter and then drizzled with maple syrup. It's the most delicious way to eat pancakes, I promise.

20 August, 2010

Cheese Fondue and Chocolate Fondue


When my niece is here visiting, we have certain traditions that must be observed. Most of those traditions revolve around food, like everything in this family of mine, and one of them is fondue. Chocolate fondue to be exact. It started when I received a fondue pot at my bridal shower. I had never had fondue or even made it before. So after we were married and my niece came to stay, we had a little adventure creating the chocolate fondue. That created the fondue tradition: homemade pizza, chocolate fondue and a movie.

This year, I thought why not use the fondue pot a little more and instead of the pizza make cheese fondue. Unfortunately, I hate Swiss cheese and that is what most fondues are. So I found a cheddar cheese beer fondue recipe from Rachael Ray and modified it a little. Her recipe called for Gruyere, which is way too expensive, so I skipped that part. It was still good.

Before I made the cheese fondue, I made all the stuff for dipping. Bratwursts, fried and cut into rounds; breaded and fried chicken tenders; blanched broccoli and cauliflower pieces; and put out breadsticks. Of course, I kept the meat and veggies warm in the oven until we were ready to eat. Then I made the fondue...


Beer and Cheese Fondue

16 oz shredded cheddar cheese
1 1/4 cup Sam Adams Boston Lager or other lager beer
1 tbsp flour
2 tbsp deli mustard, the spicy kind
1/2 tsp Frank's Red Hot
1/2 tsp Worchestershire sauce

In a medium saucepan, heat beer to a light simmer. Meanwhile, combine cheese and flour. When the beer is heated, slowly add cheese, stirring well after each addition.


Add mustard, red hot and worchestershire sauce and stir. Remove from heat and pour immediately into fondue pot.


Serve with the dipping thingys.

(there is another tradition that goes with fondue: if anybody drops something in the fondue pot, they have to kiss everybody else's cheek)

Moving on to dessert:


Chocolate fondue. Who can say no to warm, drizzily, delicious chocolateyness?

Again, I prepare the stuff for dipping first. I usually get any berries I can find, strawberries, raspberries, blackberries, snozberries...just kidding. But really, any berries will be great. I also cut up bananas and/or apples, and pound cake and add large marshmallows and pretzel rods.


When all of that is assembled, I make the fondue.

Chocolate Fondue

1/2 cup heavy cream

12 oz semi sweet chocolate chips

1 tsp vanilla

In a saucepan, heat the cream until the steam is starting to rise. Remove from heat and stir in the chocolate until melted. Stir in the vanilla and pour into the heated (and cleaned) fondue pot. Voila. Wasn't that easy?

What to do with the leftovers?

I find that leftover chocolate fondue is delicious eaten with a spoon right out of the fridge. I've also scooped it out and rolled it into little truffles that I then rolled in chopped nuts, powdered sugar or cocoa and made myself bon bons.

We did have an awful lot of cheese fondue and broccoli and cauliflower left over and that is going to go bad if just left to itself. The next day, we made steak and baked potatoes at my mother-in-law's Extended Stay hotel complete with another tiny kitchen and outdoor grill. I steamed the leftover broccoli and cauliflower and turned the cheese fondue into cheese sauce to top the veggies. To turn fondue into sauce, pour leftover fondue into a saucepan, add a splash of milk and a little butter (the ratios all depend on how much of the fondue is leftover) and heat, stirring occasionally. Add a little more milk to reach desired consistency and pour over your veggies and baked potatoes. It was quite good, if I do say so myself.
 
Miss Adventures in a Tiny Kitchen. Design by Pocket