25 July, 2010

Garlic and Peppercorn Pork Tenderloin


I have a friend that is allergic to dairy and nightshades (that would be potatoes, tomatoes, peppers and eggplants) So, this recipe is for him; or rather, his wife, my dear friend.

Pork Tenderloin is a favorite meat in my house. It is so versatile and makes a good change when I'm sick of cooking chicken over and over. I prefer to get the Hormel or Smithfield pre-marinated kind. Maybe its just me but it seems that they cook faster and more evenly than the un-marinated store kind.

Regardless, this would probably work on the un-marinated version also but I would add more cracked pepper and your choice of spices to the pan to give the pork a little more pizzazz.

Garlic and Peppercorn Pork Tenderloin

1 peppercorn marinated tenderloin, sliced into 1 inch thick medallions

2 tbsp olive oil

1 tbsp butter

¼ cup good white wine

1 tsp dried tarragon

1 tsp dried thyme

2 garlic cloves, crushed

Preheat oven to lowest temperature setting or the warm setting if your oven has one.

In large sauté pan, melt butter with olive oil over medium heat. Arrange medallions in pan and fry until cooked through, about 4 minutes per side. (I always end up slicing into the largest piece to make sure its cooked through) When fully cooked, remove from pan, place on a oven safe plate and put into the oven to stay hot.

In the same sauté pan, add crushed garlic cloves, white wine, tarragon and thyme. Cook over medium low heat to reduce. Remove medallions from oven, place on plates and pour sauce over the top.


Monterey Bay

After visiting the Grands, we stopped in Monterey Bay, CA on our way to San Francisco. We were there for parts of two days; not nearly enough time to enjoy it all. Monterey Bay was beautiful; though chilly when one is expecting the 107 degree weather of central California. It was 62 degrees when we  arrived at noon and swiftly dropped to a sunny 57.  Regardless, it was certainly a very lovely town right on the water. We dropped our stuff at the hotel and headed towards the Aquarium on Cannery Row. 
 

Before getting to the Aquarium though, we stopped for nourishment at the first restaurant we saw: The Sea Harvest Restaurant and Fish Market. It’s a cute little blue and white store with a little eating area that was packed with people. Good sign. Since hubby and I couldn’t decide on which meal to get, we split them: Clam Chowder in a Bread Bowl and Crab Salad Sandwich. 

The Clam Chowder was very yummy. I was quite impressed since it was New England Clam Chowder on the West Coast! But it was quite good. It was so thick and creamy, you could practically eat it with a fork and the potatoes and clams melted in your mouth. The bread bowl was sourdough, soft and chewy with that distinctive sour-y flavor perfect for dipping in the leftover soup.


The Crab Salad Sandwich was also Very tasty. It was the consistency of tuna salad, had great crab flavor and just a hint of spicy-ness. The tartar sauce was quite delicious. I'm not a huge fan of plain old tartar sauce but this one tasted homemade and was a perfect accompaniment to the sandwich. 

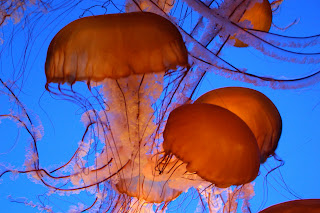
After lunch, we walked down the street to the very awesome Aquarium. I totally recommend it. Everyone that worked there was knowledge-able and friendly, there were multiple elaborate exhibits but not too much that half-way through you are sick of looking at fish. It was totally worth the trip. I would definitely go back. Here are some of the spectacular photos that hubby took

And for dinner: Cannery Row Brewing Company which opened last month. Disappointingly, they do not brew their own beer on site. They do have a number of beers that a local micro-brewery brews for them, but nothing on site there. However, our waiter was super friendly and the food was very good and very different. The coolest thing, I think, was their salads which they grill. Yes, they actually toss the lettuce onto a hot grill for a second to char the edges and give it a smoky flavor. I got the Caesar salad and I have to say the grilled lettuce was an awesome variation on the traditional. The lettuce itself was smoky and flavorful but then add the caesar fixings...amazing. 

 As a side to my salad, I ordered the Truffle Fries, french fries fried in truffle oil and sprinkled with truffle salt and cheese and served with Truffle Aioli. (That would be the Mushroom truffle not the chocolate truffle, although that would've been cool, too.) It was a Huge order of fries, enough for the entire table, and they were very, very rich but very, very good! I have never had anything made with truffles or truffle oil so it was a bit of an adventure for me; well paid off though. 

 The next morning we had breakfast at the hotel. I'm not going to write about that. Although good, it was hotel breakfast, not anything earth shattering. We had planned to leave Monterey earlier in the morning but we decided to drive around a little more. We ended up in Pacific Grove. It is a smaller town just outside of Monterey that is sort of victorian but sort of earthy but sort of asian but sort of...i don't know; it was an adorable little town. Everyone was friendly and happy even though it was 50 degrees and rainy. For lunch, we ate at The FishWife. I forgot to take a picture of the outside, sorry. The FishWife has a very sweet but sad history. In a nutshell, a young woman from Boston married a sailor and came out with him to Monterey in the 1800s. Since she was pregnant, she stayed there while he went back to Boston for provisions. In the meantime, she set up business making New England style home cooking for the sailors sailing into Monterey. They called her the Fish Wife. Sadly, her husband died when the ship he was on went down. But she carried on with her restaurant and then passed it on to her son and his wife. So we were eating recipes that she made up in the 1800s! Very cool. 
I got Clam Chowder again. This time, the chowder was almost mousse. It was thinner but the texture of the broth was like a light mousse, very soothing. It came topped with a tomato salsa like pico de gallo. That was a delicious addition. It came with a green salad, very basic. But the Honey Mustard Vinagrette was quite spectacular. It also came with a large slab of Italian bread slathered with garlic butter, enough said there.


After lunch we drove down the coast line of Pacific Grove, back out onto Route 1 and up towards San Francisco. Here are some more photos of that:


All in all, I would most definitely go back to Monterey and Pacific Grove. It was quite lovely and there are still a bunch of restaurants we haven't eaten at yet. :)

24 July, 2010

Lemon Shandies


As I said before, last week we were in California visiting the Grands. It was about 104 and sunny outside; a good day for a pool day! However when in the pool, one needs a pretty drink with a pretty umbrella in a pretty glass. Unfortunately, we were out of pretty umbrellas. So I had to be satisfied with pretty drinks in pretty glasses. Since the house is just as full of boys as girls, it couldn't be too fru-fru. So, I made Lemon Shandies, which is basically sugar syrup and lemon juice in beer. It is a great by-the-pool drink or BBQ Party drink. You can make it with only a splash of sugar syrup or if you're like me, you can make it incredibly sweet and lemon-y. It's delicious!


Lemon Shandies


1 cup sugar

1 cup water

6 lemons

6 pack of Sam Adams Summer Ale, Blue Moon or another light beer


In small saucepan, combine 1 cup sugar and 1 cup water and stir. Heat on medium high heat until sugar has fully dissolved. Remove from heat and allow to cool. Meanwhile, cut and juice 5 of the lemons. Strain to remove any seeds. When sugar syrup has cooled, add lemon juice to sugar syrup.


In a tall glass, pour 1 - 3 tbsp of lemon sugar mixture (depending on your sweet tooth). Add one beer to glass. Garnish with a lemon slice or if you are so fortunate as to have them, a pretty umbrella. Go sit by the pool and enjoy!

 If you do have a pretty little umbrella, that would make it nice too.

17 July, 2010

Nothing to do with food...

I'm in California this week and haven't been cooking at all! Sorry... But I have been taking pictures of lots of things. This week we went to see the Sequoias and spent time with the family in two different areas of CA. Tomorrow we are going to the coast to see the aquarium and the Pacific Ocean. I'll post pictures of that too when we get there. But for now, here are some of the pictures from visiting the family...

Local Fauna
 This isn't all of them. My family is a little obsessed with animals...

Sequoias -

This is Moro Rock in the Sequoia Forest.


And this is the view from the top of Moro Rock:


And these are the Sequoia trees:


If you ever have a chance to visit the Sequoia National Forest, I definitely recommend it.

And this is the view from my family's house:

It's very very hot and dry here but we are all having a lovely time. More pictures to come, probably not any recipes til I get home though :)

11 July, 2010

Mama's Chocolate Chip Cookies (the best in the world)


Everyone is known for something. My mother is known for her cookies. Also, for her super neatness; but mostly for her cookies. Its basically the toll house cookie recipe with a few modifications. She bakes them so they are slightly underdone in the middle and very chewy. She also adds more chocolate chips or sometimes the square chocolate chunks. And there are no nuts. We don't do nuts in our cookies. What she used to do when I was little is substitute one of the sticks of butter for 1/2 cup of vegetable shortening. This makes the cookies extra gooey and chewy. But then she decided shortening wasn't good for us and switched back to butter. If you don't have anything against shortening, go for it.

These are the best cookies ever. And in case you're wondering, I did ask her permission before posting this.

2 1/4 cups flour
1 tsp baking powder
1 tsp salt
2 sticks butter, softened
3/4 cup sugar
3/4 cup dark brown sugar, packed
 1 tsp vanilla
2 eggs
16-24 oz good chocolate chips

In a bowl, combine flour, baking powder and salt. In a another bowl or stand mixer bowl, combine butter, sugars and vanilla and beat until creamy. Add eggs one at a time, beating throughly. Add half of flour mixture and beat to combine. When fully combined, add the other half of flour mixture and beat well. Add chocolate chips and beat to distribute evenly.

On an oiled baking sheet, place tablespoon sized drops of dough about 2 inches apart and bake at 375 for 9 minutes.  (This is subject to your oven. I bake mine until only the edges of the cookie are golden brown.)

Remove immediately from the oven and transfer cookies to a cooling rack. Store in a large ziploc bag with a piece of bread inside to help keep the cookies moist.

09 July, 2010

Risotto


For years, I have been under the impression that the soft, creamy delightful dish that is risotto is only achieved by spending hours and hours laboriously stirring a large pot of rice thereby slowly coaxing it to give up its perfect texture. I was deceived. Risotto is incredibly easy. Granted you do need to keep an eye on it or the rice will burn to the bottom of your pan in such a way that I strongly recommend you toss the pot into the nearest trash receptacle and go purchase another one. Been there, done that.
However, it still is an easy and delicious dish with a wonderful versatility to it. Try it, you'll never go back to plain old rice.
Basic Easy Risotto
3 tbsp butter, divided
2 tbsp olive oil
1 medium white onion, chopped
3/4 cup white wine, I use Cavet Pino Grigio
4 cups chicken stock
1/2 cup shredded parmesan cheese
In heavy saucepan, combine 2 tbsp butter and olive oil over medium heat. When butter is melted, add chopped onion and cook, stirring occasionally until onion is transparent and slightly golden. Add rice to pan and stir until the rice has soaked up most of the liquid. Immediately add the white wine and stir once. When rice has soaked up most of the wine, about 2 minutes, add 1 cup of chicken stock and stir. Allow to cook for another 5 minutes, stirring occasionally. Turn heat down to medium low. Add another cup of chicken stock and cook for another 5 minutes stirring occasionally. Add third cup of chicken stock and cook another five minutes stirring occasionally. Add last cup of chicken stock and cook for five minutes stirring occasionally. Remove from heat. Stir in 1 tbsp butter and parmesan cheese. Serve.
Note: There will probably be a small amount of burned rice at the bottom. If you can't scrape it off, try filling the pan with water and adding a bit of dish soap to it. Put it back on the stove and bring to a boil. Or, you could fill it with water and dish soap and leave it in your sink for a day. That usually works for me.
Leftover Risotto
I always have leftover risotto since I always end up making more than we can eat. However, leftovers mean quick and easy dinner the next day. Hooray!
I take the leftover risotto and reheat it in a covered saucepan with about a little bit of water or white wine. You could probably do this in a microwave but I don't own one so I don't know for sure. In another saucepan I steam frozen spinach, broccoli, green beans...really whatever frozen veggie I find in the freezer. Generally, I also have leftover meat from whatever I made with the risotto the night before. I cut that meat, (chicken, pork or possibly sausage) into bite size pieces and add it to the reheating risotto. When the frozen veggie is just about done, I strain it and add it to the risotto and meat and stir well. Add a little bit more parmesan cheese and serve in bowls with perhaps a little slice of italian bread. That took probably took all of 15 minutes. Voila.

Moroccan Chicken


About a year ago I came across a Martha Stewart recipe for Moroccan Chicken. It is now one of my favorite chicken recipes. The spice rub can be used on virtually any type of chicken and probably turkey too. (Remind me, I'll try it when I get my free turkey this autumn) On our anniversary this year, I wanted to make something really special regardless of the fact that neither of us would be home before seven pm that day. But, a little planning goes a long way. I slathered a whole chicken with the spice rub the night before and let it sit in the fridge for the day.. When I got home at seven, I popped the chicken in the oven, put risotto on the stove and cut up the veggies for Panzanella. When hubby came home at eight, everything was ready! I love when that happens.
As to why I adapted Martha Stewart's perfectly good recipe? Well, her version called for cooking the bone-in type of chicken breasts at a very high heat.The first time I tried it, I lit the inside of my oven on fire. That was fun. 3 fire trucks, 2 policemen and one very stressed out husband later, I don't cook anything that high anymore. The fault of course does not lie with Martha Stewart; it lies with me and my neglectful cleaning of the bottom of my oven. Since I continually neglect the bottom of my oven, I stick to my own version of this deliciousness.
Anti-Oven Scorching Moroccan Chicken
1 tsp Cinnamon
1 tsp Coriander
1/2 tsp Tumeric
1/2 tsp Cumin
1/4 tsp Cardamom
1/4 tsp Cayenne
1/2 cup olive oil
salt and pepper to taste
4 bone-in split chicken breasts or one whole chicken
In a medium sized bowl, mix spices, s, p, and olive oil. Stir very well. If using a whole chicken, I put the chicken in a large oven safe casserole dish or roasting pan and pour the spice mixture over the top. Then, I use my hands or you could use a basting brush to slather (there is no other word for this) the mixture all over the chicken. Bake according to package directions until chicken juices run clear.

If using chicken breasts, place chicken breasts in an oven safe casserole dish, pour the mixture over the breasts and slather well. Cook at 375 for 40 minutes or until cooked through.

Serve immediately. As mentioned before, this dish goes excellently with risotto and panzanella. Or parmesan mashed potatoes would be great too. Leftovers? Check out my Risotto post for a delicious next day casserole.

08 July, 2010

Bruschetta and Vanilla Ice Cream


Well, its 107 degrees here at 4:30 in the afternoon if you trust the time and temp sign by the bank. There will be no cooking with stove or oven again tonight. Its just too hot. On the way home from work, I stopped at the grocery store for ideas and spotted store made bruschetta. That would be perfect for tonight; bruschetta on italian bread with panzanella.  Mmm.  Except that the storemade bruschetta was $5 for an itti bitti container. So, i made a mental note of the ingredients, bought the bread and tomatoes and came home to give it a shot. I couldn't find a recipe online that i liked the looks of so I made one up. It is now marinating happily awaiting consumption.

Bruschetta

2 large garlic cloves, crushed
1/4 tsp paprika
1 tsp sugar
1 tbsp balsamic vinegar
1/4 cup olive oil
10 basil leaves, roughly chopped
salt and pepper
5 medium sized tomatoes, diced
1/2 white onion, diced

In a large bowl, combine the tomatoes and onion. In another bowl, combine the other ingredients and whisk. Pour into larger bowl and stir to throughly coat the tomatoes and onions and evenly distribute all the flavors. Cover with plastic wrap and store in the fridge. Allow flavors to marinate. My suggestion would be to make the day before since everything is always better the next day.


While the bruschetta was marinating, I decided that the heat necessitated the making of ice cream. So easy to make with an ice cream machine. It only takes a few minutes.

I used the recipe for vanilla ice cream that came with the ice cream machine. Can't go wrong with the original. I did add 1/2 tsp of fresh ground nutmeg for a little dimension. Yum.

(The ice cream needs a little work. It tastes delicious but it is rock solid and very hard to dish out.)

04 July, 2010

Travel Care Package & Trail Mix


A very dear friend of mine is starting on a month long trip tomorrow, which will include incredibly long travel time. As a gift for her,  I put together a little care package of bandaids, SPF chapstick, moist wipes, pens, post its, nail file and hand sanitizer in a terribly cute clutch purse. I also made her a large bag of delicious trail mix for the trip. Hopefully, they'll let her take it on the plane. I probably should have investigated that prior to making it but too late.

Trail mixes from the grocery store are usually expensive and full of stuff one may or may not enjoy eating.  The joy of making it for myself, besides the 'Yay! I did it!" feeling, is that I can decide what I want to put in it.

So, on the hottest day yet this season, I decide to turn on the oven to 350 and make trail mix. Unfortunately, I was also attempting to multi-task. Bad idea. I neglected to remember that when toasting the nuts, one must remember to line the cookie sheet with parchment. Fortunately, all the nuts came up off the cookie sheet but it did take some coaxing on my part. At this point in the process, the house smelled beautifully of cinnamon and maple sugar and nuts. More a wintery scent but whatever. I also realized at this point that I had forgotten to add the oats to the nut mix before toasting so I popped them in the oven on the cookie sheet for a few minutes. Too many minutes as it turned out. The next time I put my head in the kitchen, there was smoke pouring out of the oven. Oops.


By the time hubby came home, the delightful wintery smell of the house was replaced by burnt oats; not nearly so pleasant. But as usually happens, the trail mix turned out delicious and the kitchen wasn't damaged at all.

Trail Mix (this can be altered in any way to fit one's particular tastes)

1 40oz container of mixed nuts
2  small bags of your favorite nuts
2 cups steel cut oats
1/3 cup maple syrup
2 tsp cinnamon
1 tsp cayenne pepper
12oz dried pineapple pieces, roughly chopped
12oz dried apricots, roughly chopped
6oz dried cranberries
8oz raisins
1 large bag of M&Ms

Preheat oven to 350. In a very large bowl, mix nuts, oats, maple syrup, cinnamon and cayenne throughly so that the syrup well coats the nuts. Spread nut mixture evenly on a cookie sheet lined with parchment paper. (ALWAYS line the sheet, trust me) Bake in oven for 7-10 minutes until the nuts are lightly toasted and fragrant.

When the nuts are fully cooled, pour into another very large bowl. Add the dried fruits and M&Ms and mix to evenly distribute everything. Store in ziploc bags and enjoy; or give away as treats. 

02 July, 2010

Panzanella


I am going to begin this blog with my new favorite summer food, Panzanella. It sounds so wonderfully gourmet. Panzanella is an Italian salad made of fresh vegetables and day old bread. It's one of the simplest recipes I've ever made and it's practically fool-proof.  Throwing together this salad for a quick, light dinner after a long day at work is amazing! I've thrown cubes of cooked chicken breast into it to make it a fuller meal. I've also made a HUGE one for a picnic. It's so versatile. Recently, I made it for a little BBQ at my Mama's. Instead of toasting the bread in the oven, we brushed it with olive oil and sprinkled it with salt and pepper and then lightly grilled it. Heavenly is the only way to describe grilled bread. Alas, I did forget to add the red onion which was a disappointment in flavor but no one else seemed to notice.

On to the recipe:

For the dressing:

2 garlic cloves, crushed
1/2 cup good olive oil
4 tbsp white wine vinegar
1 1/2 tbsp dijon mustard
salt and pepper

Whisk vigorously. (oops. too vigorous. The counter is well marinated now.)
Set this aside.

Salad:

2 cucumbers, peeled and chopped
2 bell peppers, peeled and chopped (i like using orange and yellow ones for the colour
6-8 Campari tomatoes, chopped
1 red onion, diced
8 oz container of small mozzarella balls, drained
10 good sized fresh basil leaves, roughly chopped or 1 tbsp dried basil

Combine all veggies, mozzarella and basil in a large bowl. Pour the dressing over the top and mix thoroughly. I like to use clean hands to mix it all up. I feel like the dressing always gets distributed more evenly that way. Cover bowl with plastic wrap and pop in the fridge for at least an hour. Give the flavors some time to get well acquainted. Meanwhile, prepare the bread.

I am not fortunate enough to have the outdoor living space area with which to house a grill. If I did, I would always grill the bread. Since I don't, the oven is the next best thing. I cut the Italian bread into 1 inch cubes and throw them all into a large ziploc bag. In the bag, I also add a 1/4 cup olive oil, 1 tsp cayenne pepper, 1 tsp garlic powder and salt and pepper. Toss well. Pour the coated bread onto a cookie sheet and bake in the oven at 350 for about 10 minutes, until the bread is lightly golden. Keeping the bread slightly soft in the middle adds to the yumminess. Let bread cool.

When you are ready to eat, put the bread cubes in the bottom of a bowl or on a plate and scoop the salad over the top. Make sure to pour some of the dressing all over it. Garnish with a sprig of basil and
Voila! Yum!


Miss Adventures in a Tiny Kitchen. Design by Pocket